如何调整 UIButton 的图片和文字的相对位置

iOS 开发中默认设置 UIButton 的图片和文字是图片在左文字在右,实际开发中这种默认的样式可能不是我们想要的,那么就需要进行调整,下面就介绍一下如何调整 UIButton 的图片和文字的相对位置

基本介绍

UIButton 内部的文字和图片分别对应 titleLabelimageView 两个属性,而要调整他们之间的相对位置则需要用到 titleEdgeInsetsimageEdgeInsets 两个属性,这两个属性默认是 UIEdgeInsetsZero

1
2
open var titleEdgeInsets: UIEdgeInsets // default is UIEdgeInsetsZero
open var imageEdgeInsets: UIEdgeInsets // default is UIEdgeInsetsZero

这两个属性是 UIEdgeInsets 类型,这是一个结构体类型,里面有四个参数,分别是:top, left, bottom, right,这四个参数表示距离原来位置的上边界、左边界、下边界、右边界的距离

1
2
3
4
5
6
7
8
9
10
public struct UIEdgeInsets {
public var top: CGFloat // specify amount to inset (positive) for each of the edges. values can be negative to 'outset'
public var left: CGFloat
public var bottom: CGFloat
public var right: CGFloat
public init()
public init(top: CGFloat, left: CGFloat, bottom: CGFloat, right: CGFloat)
}

top 为正值时,控件会相对原来所在的位置下移相应值,控件的顶部边缘会在原来位置的下方相应值,top 为负值时,控件会相对原来的位置上移相应值,控件的顶部边缘会在原来位置的上方相应值

left 为正值时,控件会相对原来所在的位置右移相应值,控件的左侧边缘会在原来位置的右方相应值,left 为负值时,控件会相对原来的位置左移相应值,控件的左侧边缘会在原来位置的左方相应值

bottom 为正值时,控件会相对原来所在的位置上移相应值,控件的底部边缘会在原来位置的上方相应值,bottom 为负值时,控件会相对原来的位置下移相应值,控件的底部边缘会在原来位置的下方相应值

right 为正值时,控件会相对原来所在的位置左移相应值,控件的右侧边缘会在原来位置的左方相应值,right 为负值时,控件会相对原来位置右移相应值,控件的右侧边缘会在原来位置的右方相应值

titleEdgeInsets 和 imageEdgeInsets 如何使用

UIButton 默认情况下的效果是居中实现

1
2
3
4
5
6
7
8
9
10
let button = UIButton(type: .custom)
button.backgroundColor = UIColor.lightGray
button.frame = CGRect(x: 50, y: 50, width: UIScreen.main.bounds.size.width - 100, height: 60)
button.setTitle("按钮标题", for: .normal)
button.setImage(UIImage(named: "green.jpg"), for: .normal)
button.setTitleColor(UIColor.black, for: .normal)
button.titleLabel?.backgroundColor = UIColor.orange
view.addSubview(button)

UIEdgeInsets 几个参数都是基于默认情况下的位置进行偏移的,取值可正可负,这里其实很绕的,下面我用 titleLabel 举例,用图和代码详细的描述一下这四个参数正负的区别

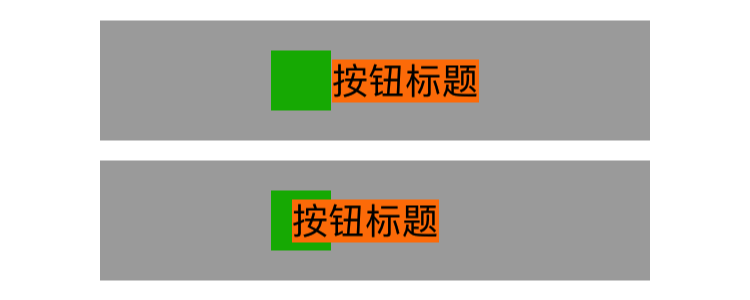
1、titleLabel 往左偏移 20

1
2
3
4
5
6
7
8
9
10
11
12
let button = UIButton(type: .custom)
button.backgroundColor = UIColor.lightGray
button.frame = CGRect(x: 50, y: button1.frame.maxY + 10, width: UIScreen.main.bounds.size.width - 100, height: 60)
button.setTitle("按钮标题", for: .normal)
button.setTitleColor(UIColor.black, for: .normal)
button.setImage(UIImage(named: "green.jpg"), for: .normal)
button.titleLabel?.backgroundColor = UIColor.orange
button.titleEdgeInsets = UIEdgeInsets(top: 0, left: -20, bottom: 0, right: 20)
view.addSubview(button)

这里 titleEdgeInsetsleft 设置为 -20,right 设置为 20 ,意思就是 titleLabel 调整之后左边的位置距离原先 titleLabel 左边位置 -20,右边的位置距离原先 titleLabel 右边位置 20,于是 titleLabel 就会整体往左移偏移了 20

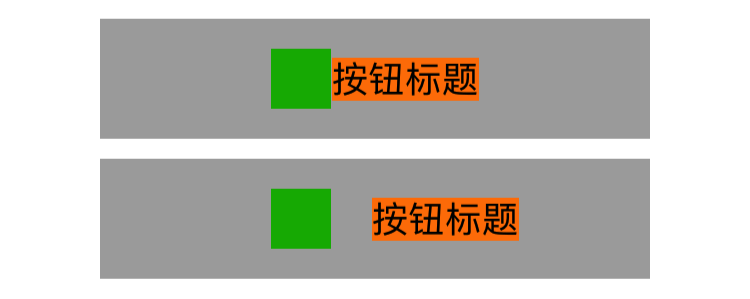
2、titleLabel 往右偏移 20

1
button.titleEdgeInsets = UIEdgeInsets(top: 0, left: 20, bottom: 0, right: -20)

这里 titleEdgeInsetsleft 设置为 20 ,right 设置为 -20,意思就是 titleLabel 调整之后左边的位置距离原先 titleLabel 左边位置 20 个像素,右边的位置距离原先 titleLabel 右边位置 -20,于是 titleLabel 就会整体往右移偏移 20

3、titleLabel 往上偏移 20

1
button.titleEdgeInsets = UIEdgeInsets(top: -20, left: 0, bottom: 20, right: 0)

这里 titleEdgeInsetstop 设置为 -20 ,bottom 设置为20,意思就是 titleLabel 调整之后上边的位置距离原先 titleLabel 上边位置 -20,下边位置距离原先 titleLabel 位置 20,于是 titleLabel 就会整体上移 20

4、titleLabel 往下偏移 20

1
button.titleEdgeInsets = UIEdgeInsets(top: 20, left: 0, bottom: 0, right: -20)

这里 titleEdgeInsetstop 设置为 20 ,bottom 设置为 -20,意思就是 titleLabel 调整之后上边的位置距离原先 titleLabel 上边位置 20,下边的位置距离原先 titleLabel 下边位置 -20,于是 titleLabel 就会整体往下偏移了 20

同理,imageViewimageEdgeInsets 的偏移设置和 titleLabel 是一样的,如果设置的偏移量超出 ButtonFrame 有可能会导致 imageViewtitleLabel 显示在 Button 外面或者被拉伸压缩

调整 titleEdgeInsets 和 imageEdgeInsets 在 UIButton 中应用

文字在左,图片在右的 Button

1
2
3
4
5
6
7
8
9
10
let imageWith = button.imageView?.bounds.size.width
let imageHeight = button.imageView?.bounds.size.height
let titleWith = button.titleLabel?.bounds.size.width
let titleHeight = button.titleLabel?.bounds.size.height
// titleLabel 往左偏移 imageView 的宽度
button.titleEdgeInsets = UIEdgeInsets(top: 0, left: -(imageWith! + 1), bottom: 0, right: (imageWith! + 1))
// imageView 往右 titleLabel 的宽度
button.imageEdgeInsets = UIEdgeInsets(top: 0, left: (titleWith! + 1), bottom: 0, right: -(titleWith!+ 1))

文字在下,图片在上的 Button

1
2
3
button.titleEdgeInsets = UIEdgeInsets(top: imageHeight! * 0.5 + 1, left: -imageWith! * 0.5 , bottom: -imageWith! * 0.5 + 1, right: imageWith! * 0.5)
button.imageEdgeInsets = UIEdgeInsets(top: -(titleHeight! + 1) * 0.5, left: (titleWith! * 0.5), bottom: (titleHeight! + 1) * 0.5, right: -(titleWith! * 0.5))

文字在上,图片在下的 Button

1
2
3
button.titleEdgeInsets = UIEdgeInsets(top: -imageHeight! * 0.5 + 1, left: -imageWith! * 0.5 , bottom: imageWith! * 0.5 + 1, right: imageWith! * 0.5)
button.imageEdgeInsets = UIEdgeInsets(top: titleHeight! * 0.5 + 1, left: titleWith! * 0.5, bottom: -titleHeight! * 0.5 + 1, right: -titleWith! * 0.5)

以上就是我关于的调整 UIButton 文字和图片位置的简单总结,其实明白了怎么使用 titleEdgeInsets 和 imageEdgeInsets 的偏移,就可以自定义出各种摆放位置的 UIButton

有兴趣的还可以阅读以下文章:

本人刚开始写博客,主要是为了给自己的知识点做一个笔记,方便自己以后查阅,如果能让别人有所启发也是荣幸之至!如有错误,欢迎指正!