自定义 UITableViewCell

iOS 开发中 UITableView 是用的非常多的控件之一,而 UITableViewCell 是构建一个 UITableView 的基础,UITableViewCell 系统提供了四种默认的样式,但是实际开发中这四种样式往往不能满足要求,于是就需要自定义 UITableViewCell,本文就简单介绍一下如何自定义 UITableViewCell

系统 UITableViewCell 样式

自定义 UITableViewCell 之前还是先介绍一下系统默认提供的四种样式的 UITableViewCell 吧

UITableViewCellStyleDefault: Default样式,左边一个显示图片的imageView,一个标题textLabel,没有detailTextLabel

UITableViewCellStyleSubtitle: Subtitle样式,左边一个显示图片的imageView,图片右边的上边一个主标题textLabel,下边一个副标题detailTextLabel,主标题字体大且加黑,副标题字体小颜色是淡灰色

UITableViewCellStyleValue1: Value1样式,左边一个显示图片的imageView,图片右边一个主标题textLabel,cell的最右边一个副标题detailTextLabel,主标题字体比较黑

UITableViewCellStyleValue2:Value2样式,左边一个主标题textLabel字体偏小,挨着右边一个副标题detailTextLabel,字体大且加黑

实际开发中系统默认的四种样式用的很少,所以才有本文的内容,自定义 UITableViewCell

使用 XIB 自定义 UITableViewCell

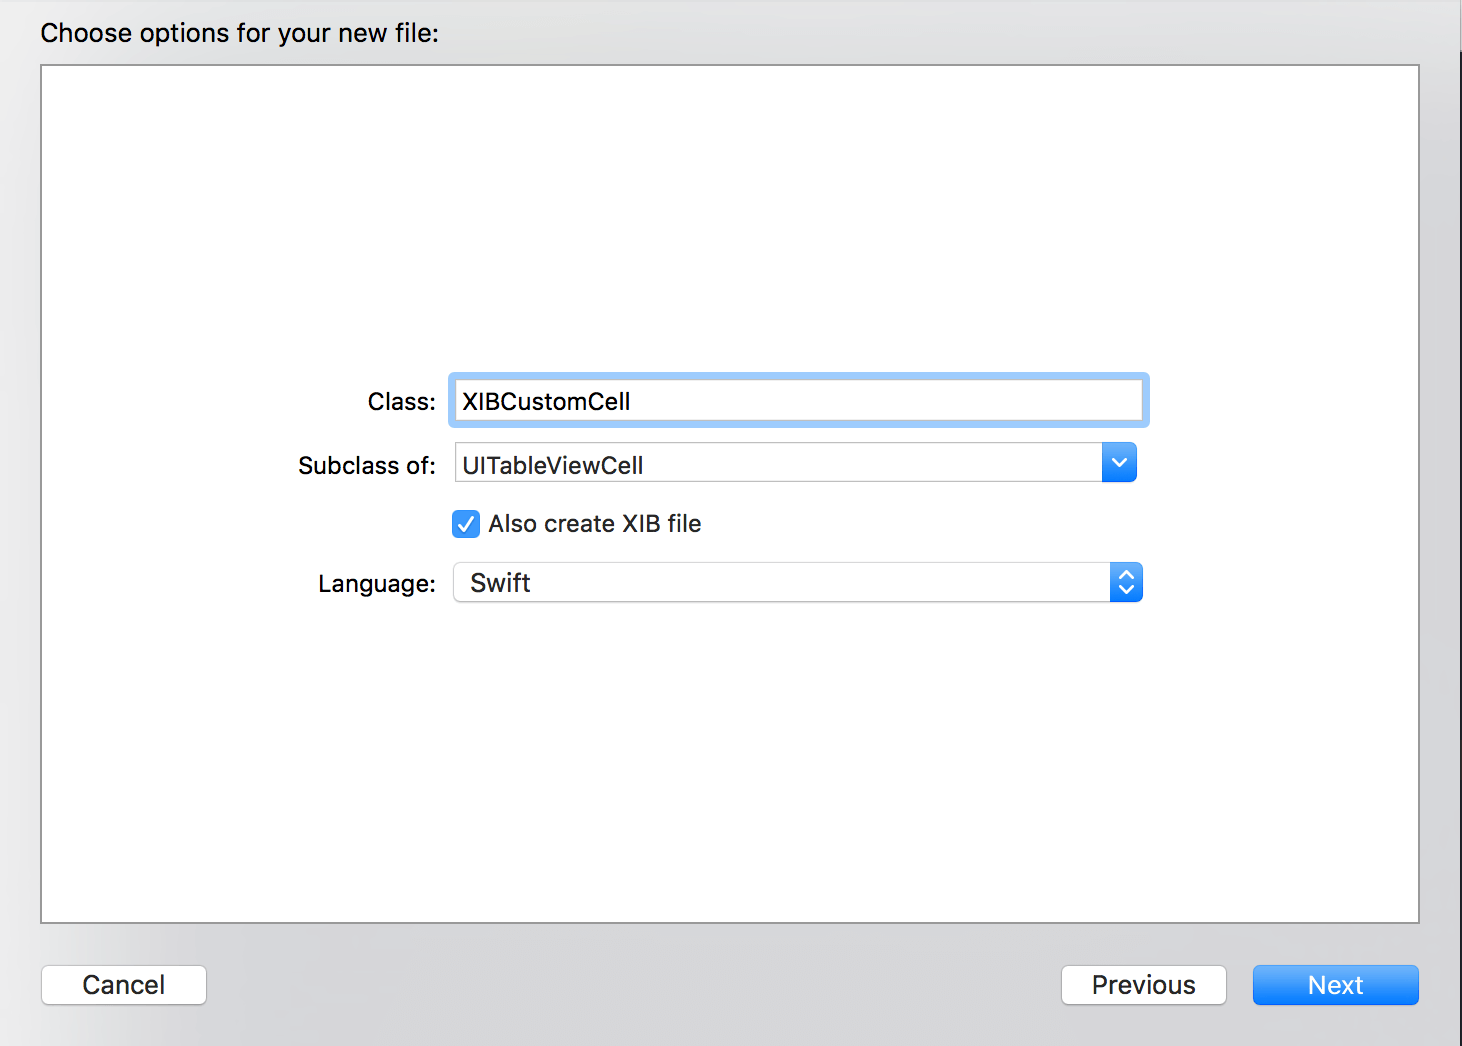
使用 XIB 自定义 UITableViewCell比较简单快捷, 首先需要在工程里新建一个继承自 UITableViewCell 的 XIBCustomCell 的类,创建的时候勾选 Also creat XIB file

然后在 XIB 里面添加控件,设置好约束和位置,再通过拖线的方式把添加的控件作为属性

然后在 UITableView 中使用自定义的 Cell 的时候就可以直接给 centerImagerightLab 属性赋值了

纯代码自定义 UITableViewCell

纯代码的方式自定义 UITableViewCell 的话就需要自己手写代码了,在工程里新建一个继承自 UITableViewCell 的 CodeCustomcCell 的类

然后根据项目的 UI 设计图,重写 init(style: UITableViewCellStyle, reuseIdentifier: String?) 方法,在这个方法里面添加所需的控件:

1
2
3
4
5
6
override init(style: UITableViewCellStyle, reuseIdentifier: String?) {
super.init(style: style, reuseIdentifier: reuseIdentifier)
// 添加所需的控件
}

添加完控件之后,再重写 layoutSubviews 方法,在这个方法里面布局我们添加的控件,这边为了演示方便就简单的在 CodeCustomcCell 中间添加一个图片,右边添加一个 UILabel,下面是完整的CodeCustomcCell 代码:

1
2
3
4
5
6
7
8
9
10
11
12
13
14
15
16
17
18
19
20
21
22
23
24
25
26
27
28
29
30
31
32
33
34
35
36
37
import UIKit
class CodeCustomcCell: UITableViewCell {
var centerImage:UIImageView?
var rightLab:UILabel?
override func awakeFromNib() {
super.awakeFromNib()
}
override init(style: UITableViewCellStyle, reuseIdentifier: String?) {
super.init(style: style, reuseIdentifier: reuseIdentifier)
centerImage = UIImageView()
self.contentView.addSubview(centerImage!)
rightLab = UILabel()
self.contentView.addSubview(rightLab!)
}
override func layoutSubviews() {
super.layoutSubviews()
centerImage?.bounds = CGRect(x: 0, y: 0, width: 40, height: 40);
centerImage?.center = self.contentView.center
rightLab?.frame = CGRect(x: UIScreen.main.bounds.size.width - 60, y: 0, width: 50, height: self.contentView.frame.size.height)
}
required init?(coder aDecoder: NSCoder) {
super.init(coder: aDecoder)
}
}

注意:自定的 Cell 的时候添加控件要添加到 Cell 的 contentView 里面,否则可能 Cell 左右滑可能出现问题

在 UITableView 中使用自定义的 UITableViewCell

不管是通过上面哪一种方式自定义 UITableViewCell,最后都要添加到 UITableView 中使用才能体现 Cell 的效果,UITableView 使用 Cell 有两种方式:一种是需要先注册,当一个 UITableView 里面多种不同的 UITableViewCell 还需要用不同的 cellReuseIdentifier 注册,另一种不需要注册但是需要在 UITableView 的代理方法里做判断

第一种方式:先注册,再使用

1
2
3
4
5
//纯代码自定 UITableViewCell 或者 系统默认的 Cell 使用这种注册方式
self.testTableView?.register(CodeCustomcCell.self, forCellReuseIdentifier: "CodeCustomcCell")
//使用 XIB 自定 UITableViewCell 使用这种注册方式
self.testTableView?.register(UINib.init(nibName: "XIBCustomCell", bundle: nil), forCellReuseIdentifier: "XIBCustomCell")

使用上面其中一种注册方式之后,在 UITableView 的代理方法里面就不需要在注册可以直接使用了

1
2
3
4
5
6
7
8
9
10
11
12
13
14
15
func tableView(_ tableView: UITableView, cellForRowAt indexPath: IndexPath) -> UITableViewCell {
// 这个 Identifier 必须和上面注册用的 Identifier 一致
let cell = tableView.dequeueReusableCell(withIdentifier: "XIBCustomCell") as! XIBCustomCell
cell.rightLab?.text = "标题"
cell.centerImage?.image = UIImage(named: "avatar.jpg");
return cell;
}
func tableView(_ tableView: UITableView, numberOfRowsInSection section: Int) -> Int {
return 15
}

第二种方式:不注册,直接在 UITableView 代理方法里判断

1
2
3
4
5
6
7
8
9
10
11
12
13
14
15
16
17
18
19
20
func tableView(_ tableView: UITableView, cellForRowAt indexPath: IndexPath) -> UITableViewCell {
let reuseIdentifier = "CodeCustomcCell"
var cell:CodeCustomcCell! = tableView.dequeueReusableCell(withIdentifier: reuseIdentifier) as? CodeCustomcCell
//线判断 nil 其实可以认为是在需要的时候才注册
if cell == nil {
cell = CodeCustomcCell(style: .default, reuseIdentifier: reuseIdentifier)
}
cell.rightLab?.text = "标题"
cell.centerImage?.image = UIImage(named: "avatar.jpg");
return cell;
}
func tableView(_ tableView: UITableView, numberOfRowsInSection section: Int) -> Int {
return 15;
}

另外再提一下, TableView 有两个寻找可重用标识符的 Cell 的方法:

1
2
3
open func dequeueReusableCell(withIdentifier identifier: String) -> UITableViewCell?
open func dequeueReusableCell(withIdentifier identifier: String, for indexPath: IndexPath) -> UITableViewCell

第一个方法从 iOS2 开始就存在了,第二个方法从iOS6 才开始使用,他们区别就是:

  • 如果你注册过 Cell,在没有可用的 Cell时,方法一会返回 nil,而后者永远都会从注册的 nib 或者 class 中替你创建一个可用的 Cell,也就是说,前者调用你需要手动检查nil,而后者不需要

  • 如果你没有注册过 Cell,在没有可用的 Cell 时,方法一会返回 nil,方法二会直接崩溃!也就是说,调用方法二你必须确保注册过 Cell

以上就介绍了如何自定义 UITableViewCell 以及在 UITableView 中如何使用 UITableViewCell

本人刚开始写博客,主要是为了给自己的知识点做一个笔记,方便自己以后查阅,如果能让别人有所启发也是荣幸之至!如有错误,欢迎指正!